

Hewing a bowl with an axe and an adze certainly qualifies for what David Pye called “the workmanship of risk.” The risk doesn’t end when the axe is laid down. Anyone who is going to carve many bowls is sure to have some crack, but with a little foresight it shouldn’t occur often at all. I’ve got another one ready to dry…
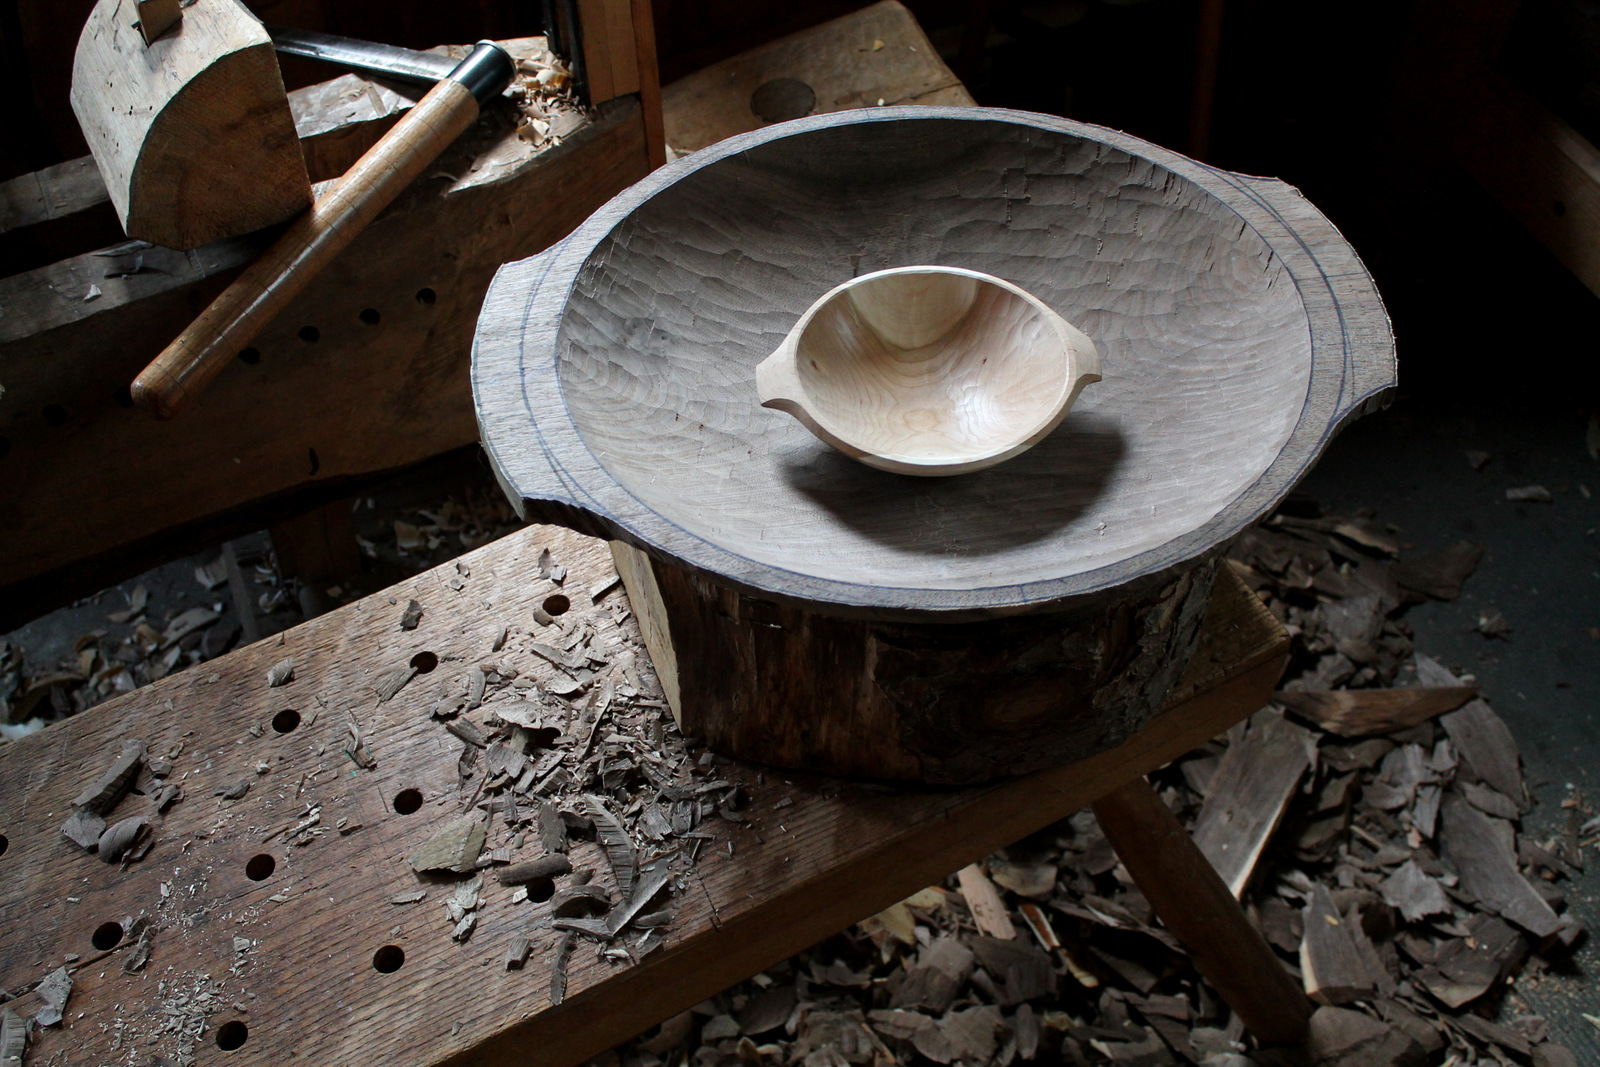
A couple days ago, I got around to hewing the 22″ x 17″ walnut bowl that I had laid out a while back. In the photo above, it sits drying after the adze and axe work. Inside it is a 7″ wide cherry bowl I just finished carving that gives a sense of scale. That is all there is to my typical drying procedure. I just sit it somewhere in the shop and check it out from time to time. I have found that the most important steps to prevent cracking take place long before the carving begins. Here’s my crack (and crying) prevention procedure.
Before carving:
- If I can’t use a log right away, I try to store it whole with the bark intact. I paint all of the end grain with two heavy (slopped on) coats of leftover latex paint. I keep the logs in the shade. I’ve used them over a year later in some cases.
- When I’m ready to use a log, I start by cutting off a couple inches or so (depending on how bad the end checks might be) of the length from each end. I study the end grain intently. Any major checks may determine along what line I split the log in half. Even the tightest, smallest checks have to be identified because the bowl will crack along these lines of weakness as it dries. Sometimes small checks can be avoided without cutting away more log length by orienting the bowl in such a way that that area of the log will be carved away later.
- Once I am happy with the check situation, I split the log to make sure the pith, or center, of the tree will not be in the bowl. Due to the differential between the amount wood shrinks along the growth rings compared to perpendicular to them (it shrinks much more along the growth rings, cracks usually project out from the pith.
- Due to this differential shrinkage, a bowl that is oriented in the traditional fashion (bark down) will develop some degree of crown across it’s top as it dries and the top width will increase slightly. A bowl that is oriented bark-up will get slightly less arched and the sides will get a little closer to each other. For us carvers, this is no problem at all — let it move, and our tools freely follow the new shape (still symmetrical usually) as we make our final cuts after drying.
- Some woods and conditions are more prone to cracking. There are lots of charts available that show the percent of shrinkage of various wood species, but there are many other factors such as the moisture content when harvested or a tree growing under tension on a hillside. I’ve learned a lot just by trying lots of woods and scenarios, but I still get surprised, and not always pleasantly.
During Carving:
- If I have to pause midway during the green carving stage, I always keep the piece in a plastic bag. I don’t want any drying to occur until enough mass has been removed from the log so that it can move as it dries without cracking.
- Bulky areas are prone to problems. I think of it this way: even with the pith gone, a half-log will still crack on the ends because the ends are losing moisture much faster than the interior. When we carve a bowl, we reduce this differential greatly. If we get rid of enough bulk, then the moisture can escape more evenly and the bowl can move freely as it dries.
- I try to make sure the thickness of various parts of the bowl are symmetrical, so that both sides move in the same way and dry at the same rate. Hands and eyes do the job.
After Carving:
- I am in no hurry to dry a bowl, but I have found that drying too slowly (buried in wet chips, plastic bag rotation, etc.) can often result in mold or stains that go too deep to be removed in the final carving stage.
- I will often rub a bar of paraffin wax across the handle ends before setting the bowl aside for drying.
- I consider weather, humidity, and other conditions that might impact drying. If I lived in Arizona, I might have to adjust my procedures! Absolutely, I keep a drying bowl away from wind.
- If I am concerned that a bowl may dry too fast and crack, I will slow it down through a variety of methods. Sometimes just letting it dry while sitting on top of fresh chips is enough. Some other methods I have used successfully are burying the bowl in dry shavings, drying in a paper bag, and wrapping it like a mummy in an old bed sheet. This last one I tried recently, and it worked well. The drying is regular, but slowed.
- You can check if a bowl has dried completely by weighing it on a kitchen scale over successive days. When it stops losing weight, that’s as far as it will go under those conditions. I usually just go by feel to know when I will do the final carving. Sometimes this is after two weeks of drying, often longer. I’ll definitely wait longer before hand planing the bottom flat.
- A couple weeks in with no cracks and you’re home free. No worries after that.
Although I rarely have a bowl crack during drying now, it is the nature of this workmanship of risk. And besides, it may be an opportunity to try something creative:

(Apologies to Buck Owens and Ray Charles for the title of this post!)

David, this is an incredibly helpful post! Thanks for the write up.
LikeLike
Interesting. Picked up some new ideas (e.g. paraffin waxing the handles – makes sense to me; sheet wrapping – similar to an idea mention by Martin Damon, although he uses hessian/sacking).
One thing particularly caught my attention: you don’t plane the base of the bowl until it has dried – is that correct? I usually plane before drying (but, if I scrape, I do that after drying). I can see the logic to it: just last week I had the bottom of a bowl bow outwards after drying – the bowl already had an exceptionally thin base (my mistake) so the effect is probably exaggerated and further shaving/planing undesirable. (Fortunately I was able to correct it & the “customer”, my young nephew, is more interested in the carved dragon viking prow I added later 😀 ).
LikeLike
Tone,
I hew and plane the bottom surface in the initial stages of hewing the log. After the green carving stage, that bottom surface bows in or out a bit, so I try to wait until the bowl has dried completely before making final light passes with the plane to bring it to flat. Still, it really is not a big deal if the bottom goes a bit out of flat later.
LikeLike
Makes sense. Thanks 🙂
LikeLike
Very helpful. I’m working on my second bowl and struggling with drying. Couple of questions, I placed the bowl in a paper bag because I was afraid of it cracking, but I came back to it later and it immediately started to mold! I carved it away, but it looks like it’s stained through… How can I avoid this and is this cosmetic or is it something I should be greatly concerned? Thanks
LikeLike
I used to be frustrated by the same thing, so I tried just letting the bowls dry out of the sun and wind in a corner of my workshop. No cracks. Well – usually. But I am more and more convinced that most cracks occur because of hairline checks in the end of a log that were present before the carving even began. These points of weakness open up as the bowl dries. If a log has been in storage — even with the ends painted, cut off a couple inches and inspect that end grain carefully before proceeding. Some wood is under stress (weight bearing branches and such) that tend to crack more often. If I am concerned, lately I have been loosely wrapping or draping an old sheet around a drying bowl. This seems to slow things down enough and avoid mold. That said, I don’t think your mold (or mold stain) is a serious concern, just cosmetic.
LikeLike
Oxalic acid, sometimes called ‘wood bleach” can be effective at removing stains. I used it once to clean up a tannin stained oak bowl that I was particularly pleased with for its shape & size. (It developed a skew so I kept it – a bowl “only a mother could love”, it’s still special to me!). I was surprised and pleased with how well the oxalic acid worked. 🙂
Be careful with oxalic acid though, as it is corrosive. I think of it as being stronger than vinegar. Don’t ingest it 😉
LikeLike
Sorry Dave…I am getting acquainted with your blog and found the drying recommendations..I currently am using a paper bag..Weighing sounds interesting
LikeLiked by 1 person
Hi David. I love your blog! I am wondering about your final picture in this post. Did you wait for the bowl to be fully dried to put in your butterfly key? I’m considering trying this on a bowl I am currently working on, still green and cracking. Due to the continued shrinkage I think I should wait to put in the butterfly key but I am worried about it splitting farther into the bowl. Thoughts?
Thanks for all your writing and your recent Fine Woodworking videos!
Cheers , Gregory
LikeLike
Hi Gregory. I would wait for the bowl to be dry before fitting the key. You wan’t the fit of the key to be nice and tight, so much movement afterward would be unwelcome. In the meantime, you could put a clamp across the handle or wrap with some cord in an attempt to resist any further splitting as it dries. Worth a shot anyway! Good luck.
LikeLike
That’s great. Thank you!
LikeLike
Thought I’d follow up on this. I continue to be inspired by your work in carving, teaching and writing.
That worked out great! I let it dry with the string wrapped around the splitting end. When I removed the string I let it sit around for a little longer, to see if it needed to shift any more. I then added a butterfly key. It has held up great at my mother’s house ever since.
Thanks again!
Gregory
LikeLiked by 1 person
Informative and inspiring (especially the surprise “Compassion” butterfly at the end!).
LikeLiked by 1 person
Pingback: Drying for Carving Versus Turning | David Fisher, Carving Explorations
Pingback: Drying Revisited | David Fisher, Carving Explorations